How to Install Microsoft Clarity With Google Tag Manager and GA4
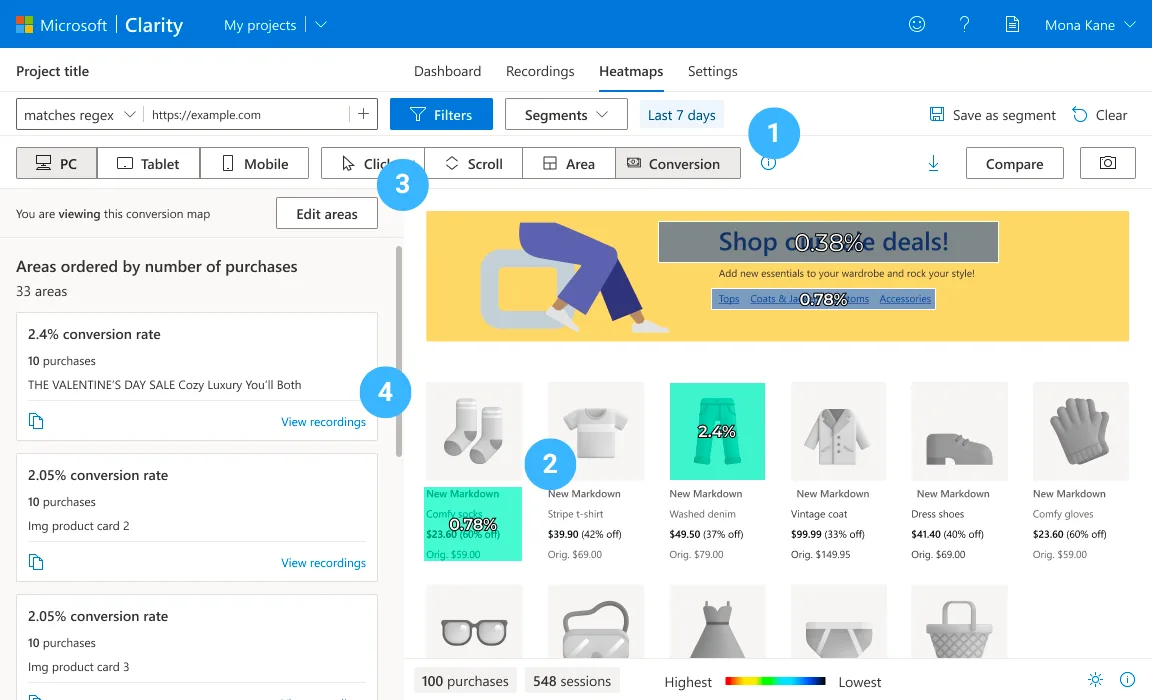
Microsoft Clarity can be installed through Google Tag Manager (GTM) without editing your site's theme files. Create or open a Clarity project, connect its recommended GTM integration, publish the container, verify that the browser sends a request to clarity.ms/collect, and then connect the same Clarity project to your Google Analytics 4 property. If your site requires consent, pass the visitor's choice through Clarity ConsentV2 before relying on recordings or cross-page sessions.
This guide walks through the recommended setup, a manual fallback, verification, GA4 integration, consent handling, and the problems that most often leave a Clarity project with no data.
What each tool does
Clarity, GTM, and GA4 overlap slightly, but they answer different questions.
| Tool | Main job | A useful question it answers |
|---|---|---|
| Microsoft Clarity | Session recordings, heatmaps, and behavioral signals | Where do visitors hesitate, repeatedly click, or stop scrolling? |
| Google Tag Manager | Deploys and controls tracking tags | Which code runs, on which pages, and under what conditions? |
| Google Analytics 4 | Measures acquisition, engagement, and key events | Which campaign or channel brought valuable sessions? |
The combination is useful because GA4 can help you locate a weak landing page or traffic segment, while Clarity can provide visual evidence about what people did on that page. GTM keeps the implementation manageable without hard-coding another script into the site.
Clarity should complement—not replace—your analytics and testing process. A recording may suggest a problem, but you still need to form a hypothesis and measure whether a change improves results.
What you need before starting
Make sure you have:
- A Microsoft Clarity project for the website.
- Edit or publish access to the correct Google Tag Manager container.
- Access to the website's Google Analytics 4 property if you plan to connect it.
- A consent-management process appropriate for the regions you serve.
- A test visit you can make after publishing.
Use a separate Clarity project for a different website or business property rather than mixing unrelated traffic. Also confirm that you are working in the production GTM container—not a similarly named test container.
If you already use GTM for GA4 campaign measurement, keep your naming documentation nearby. Our guide to tracking social media campaigns in GA4 with UTM parameters shows how consistent campaign labels make later analysis much easier.
Method 1: Install Clarity through its recommended GTM integration
Microsoft's recommended workflow publishes the Clarity tag through your GTM account.
- Sign in to Microsoft Clarity and open the correct project.
- Select Settings, then Setup.
- Under the Google Tag Manager installation option, choose Finish setup.
- Sign in to the Google account that has access to GTM.
- Select the correct GTM account and container.
- Review the requested access and choose Create and publish.
- Confirm that the integration reports a successful installation.
Microsoft documents this workflow in its official Google Tag Manager integration guide.
This route is the simplest when you have permission to publish the container. If your organization separates tag creation from publishing, the automatic workflow may not fit your approval process. In that case, use the template or Custom HTML method below and submit the container version for review.
Check the container before publishing
Before accepting any automatic publish action, verify:
- The GTM container ID matches the website.
- The Clarity project name and domain are correct.
- There is not already another Clarity tag firing on all pages.
- Your consent configuration will not allow the tag to behave outside the visitor's choice.
Two Clarity installations can create confusing diagnostics and unnecessary requests. Search the GTM workspace for “Clarity,” inspect the site's source, and check existing Custom HTML tags before adding another copy.
Method 2: Use the Clarity tag template in GTM
The GTM template approach gives your team more control over preview, approval, and publishing.
- In Google Tag Manager, open Tags and choose New.
- Open Tag Configuration.
- Search the Community Template Gallery for Microsoft Clarity.
- Add the template after reviewing its requested permissions.
- Enter the Clarity project ID.
- Choose an All Pages trigger, unless your consent design requires a different trigger.
- Name the tag clearly, such as Microsoft Clarity – Production.
- Save it, enter Preview mode, and test it.
- Submit and publish the container only after verification.
Copy the project ID from Clarity rather than typing it from memory. It appears in the Clarity tracking code and project settings.
The template is useful when you want a visible tag configuration instead of a pasted script. However, a template does not remove your responsibility to review consent, triggers, and data-handling settings.
Method 3: Install Clarity with a Custom HTML tag
Use this fallback when the direct integration or template is unavailable.
- In Clarity, open Settings → Setup.
- Select the manual installation option and copy the complete tracking code.
- In GTM, choose Tags → New.
- Select Custom HTML as the tag type.
- Paste the unmodified Clarity tracking code.
- Add the appropriate trigger—commonly All Pages after consent conditions are satisfied.
- Save the tag and test it in GTM Preview mode.
- Publish the container.
Do not copy tracking code from a blog post or another website. The script contains the project-specific ID, so use the code displayed inside your own Clarity project.
Name the GTM version clearly
A useful version name might be:
Add Microsoft Clarity with ConsentV2
In the version description, record the Clarity project ID, trigger choice, consent behavior, and test URL. This small habit makes future troubleshooting much faster.
How to verify that Microsoft Clarity is working
Publishing the GTM container is not the same as confirming data collection.
1. Test with GTM Preview
Open GTM Preview, connect it to the website, and load several pages. Confirm that the Clarity tag fires only when expected.
If the tag does not fire, inspect:
- Trigger conditions.
- Consent state.
- Exceptions or blocking triggers.
- Whether you previewed the correct container and environment.
2. Look for the collection request
Microsoft recommends checking the browser's developer tools:
- Open the site in a new browser tab.
- Open Developer Tools and select Network.
- Reload the page.
- Search the requests for
clarityorcollect. - Confirm a POST request is sent to
https://www.clarity.ms/collect.
This request is a stronger implementation check than merely finding the script in the page source. Microsoft's Clarity setup guide describes both live-data and network verification.
3. Check the Clarity project
Return to Clarity and look for a live user or newly collected data. The dashboard can take a few hours to populate, according to Microsoft's Clarity FAQ.
Make a recognizable test journey: visit the home page, open a landing page, scroll, and click a non-sensitive navigation element. Do not enter real payment details or private information just to create a test recording.
How to connect Microsoft Clarity to GA4
Once Clarity is collecting data, connect the GA4 property:
- Open the Clarity project.
- Go to Settings → Setup.
- Find the Google Analytics integration.
- Choose Get Started.
- Sign in to the Google account that can access the desired GA4 property.
- Select the correct web property.
- Choose Save.
Microsoft's GA4 integration documentation notes that one web property can be connected to a Clarity project at this point. If you disconnect it, you need to perform the integration again to reconnect.
Use the property's name, domain, and measurement details to confirm you selected the correct one. Organizations often have separate production, staging, and regional properties with similar names.
What the GA4 connection is for
The integration helps connect quantitative analytics with visual behavior analysis. A practical workflow is:
- In GA4, identify a campaign or landing page with traffic but weak key-event performance.
- Narrow the date range and device type.
- Open the corresponding experience in Clarity.
- Review heatmaps and a sample of relevant sessions.
- Note repeated patterns rather than treating one recording as proof.
- Change one important element.
- Measure the result in GA4 over a comparable period.
For paid traffic, combine this with a disciplined bidding and landing-page process. Our guide to the Google Ads bid target adjustment tool explains why budget or bid changes should be evaluated alongside conversion quality—not in isolation.
Configure Clarity ConsentV2
A tracking tag firing successfully does not mean its consent behavior is correct.
Microsoft recommends ConsentV2, which replaces its earlier consent API. Pass the visitor's current choices to Clarity with values for advertising and analytics storage:
<script>
window.clarity('consentv2', {
  ad_Storage: 'denied',
  analytics_Storage: 'granted'
});
</script>
Each value must reflect the choice supplied by your consent-management platform. Do not hard-code “granted” for every visitor.
Microsoft's ConsentV2 documentation explains that when storage is denied, Clarity does not set first- or third-party cookies and uses a unique identifier per page view instead of maintaining session persistence.
For visitors in the European Economic Area, United Kingdom, and Switzerland, Clarity's consent behavior is especially important. Microsoft says a valid consent signal has been required for full functionality in those regions since October 31, 2025. Review its consent requirements and Consent Mode guide, then configure your CMP and GTM triggers to match your legal and privacy requirements.
This is implementation guidance, not legal advice. Your organization remains responsible for deciding what consent is required and how it should be documented.
Test both consent paths
Test at least two fresh sessions:
- Analytics allowed: the Clarity tag and collection request behave as designed.
- Analytics denied: the site respects the denied state and does not silently override it.
Clear cookies or use a private browser window between tests. Also retest when a visitor changes their preference through your site's privacy controls.
Protect sensitive information
Before sending real traffic to recordings, review Clarity's masking and privacy settings.
At minimum:
- Mask sensitive text and form fields.
- Avoid recording payment, authentication, health, or private account information.
- Exclude internal tools, staging environments, and administrator pages where appropriate.
- Never send names, email addresses, phone numbers, or other personal data as custom tag values.
- Document who can access recordings and why.
A heatmap usually provides enough evidence for many layout questions. Do not collect more detailed data simply because the tool makes it possible.
Common problems and fixes
Clarity shows no data
First, wait long enough for the dashboard to populate. Then verify the POST request to clarity.ms/collect.
If there is no request:
- Confirm the GTM container was published, not merely saved.
- Check that the container snippet is installed on the page.
- Compare the project ID with the tracking code in Clarity.
- Inspect trigger and consent conditions in GTM Preview.
- Test without browser extensions that intentionally block analytics.
- Review Content Security Policy or network errors in the browser console.
Microsoft's installation troubleshooting guide also recommends confirming that the correct script is installed on every intended page and subdomain.
Data appears only on some pages
The GTM container may be missing from a template, subdomain, or checkout flow. Compare a working page and a missing page in Developer Tools. If they use different containers, document which project should cover each environment.
GA4 connects to the wrong property
Disconnect the integration in Clarity, confirm the Google account and property details, and repeat setup. Because only one web property is connected per Clarity project, do not guess when properties have similar names.
Recordings are fragmented
Consent or cookie restrictions may prevent cross-page session persistence. Check the ConsentV2 state and regional behavior before assuming that the Clarity script is broken.
You see duplicate activity
Look for a second Clarity installation in:
- GTM tags.
- The website theme or header.
- A CMS plugin.
- A marketing platform's native integration.
Keep one controlled implementation and remove the redundant deployment through the system that owns it.
A practical weekly Clarity and GA4 workflow
Installing the tools is only the first step. Use a repeatable review routine:
1. Start with a business question
Examples include:
- Why did mobile sign-ups fall on a landing page?
- Do visitors see the primary call to action?
- Which page section creates repeated clicks?
- Where do paid visitors abandon the journey?
2. Use GA4 to define the segment
Choose a specific date range, device category, source, campaign, or landing page. Avoid reviewing random recordings without a question.
3. Use Clarity to find repeated behavior
Review a reasonable sample and compare it with heatmaps. Look for patterns such as repeated interaction with a non-clickable element, an important button below common scroll depth, or a navigation path that sends users backward.
4. Turn the observation into a testable hypothesis
Write a statement such as:
Moving the mobile call to action above the most common fold will increase completed sign-ups.
This is more useful than “the page looks confusing.”
5. Measure the change in GA4
Track the same key event, segment, and comparable period. Account for campaign mix, promotions, and other changes that could affect the result.
Final setup checklist
Before considering the installation complete, confirm:
- The correct Clarity project ID is deployed.
- The correct GTM container is published.
- The tag fires only under the intended conditions.
- The browser sends the Clarity collection request.
- Live or dashboard data appears in the correct project.
- The correct GA4 web property is connected.
- ConsentV2 reflects the visitor's actual choices.
- Sensitive content is masked or excluded.
- Staging, admin, and unrelated domains are handled intentionally.
- Your team has a documented process for reviewing and acting on insights.
Frequently asked questions
Do I need Google Tag Manager to use Microsoft Clarity?
No. Clarity also supports direct installation by placing its tracking code on the website. GTM is useful when a team wants centralized deployment, preview, version history, triggers, and consent controls.
How long does Clarity take to show data?
You may be able to verify collection immediately with the Network panel or live-user view, but Microsoft says dashboard data can take a few hours to appear.
Can one Clarity project connect to multiple GA4 web properties?
Microsoft's current documentation says one web property can be connected to a Clarity project at a time.
Is finding the Clarity script in page source enough?
No. Also confirm that the browser sends the POST request to clarity.ms/collect and that the data arrives in the correct Clarity project.
Should Clarity load before consent?
That depends on your consent design, applicable rules, and Clarity configuration. Implement your CMP decision consistently, pass it through ConsentV2, and test both granted and denied paths.