How to Schedule Social Media Posts for Free With Buffer
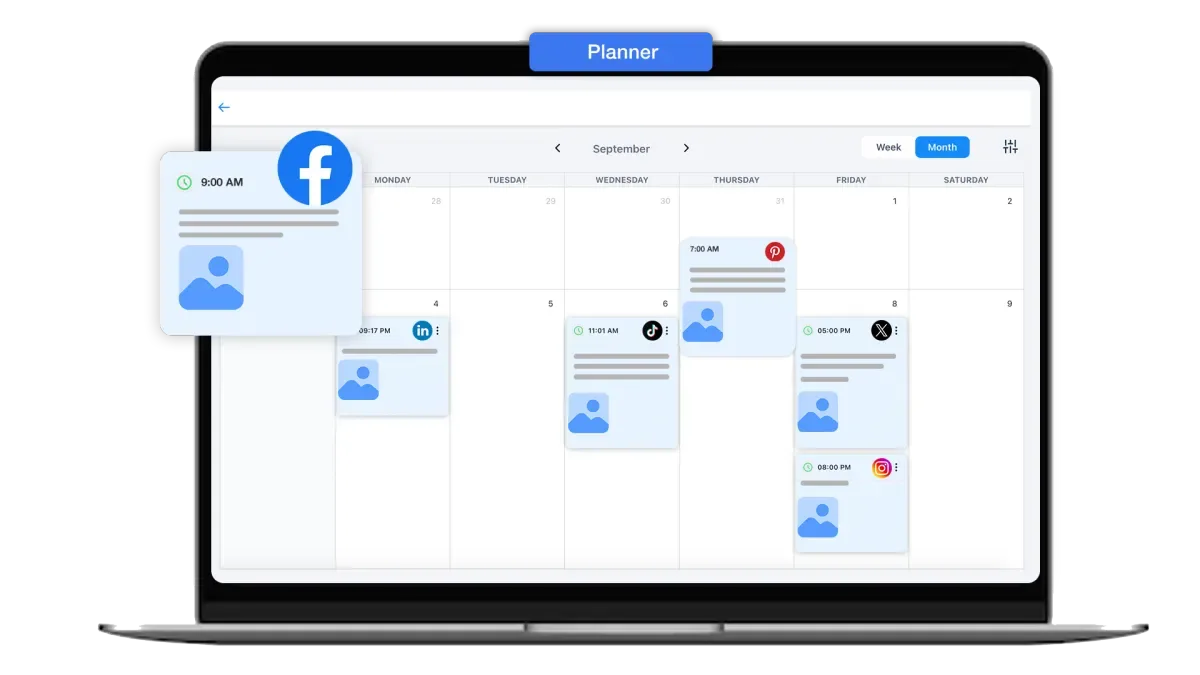
You can schedule social media posts for free with Buffer by connecting up to three social channels, creating a posting schedule for each one and adding posts to the queue. As of September 1, 2026, Buffer’s Free plan allows 10 scheduled posts per channel at a time. When one publishes, that queue slot becomes available again.
The free plan is a practical fit for one person managing a small brand—for example, an Instagram professional account, a Facebook Page and a LinkedIn profile. It can schedule images and videos, show a calendar and customize one post for multiple networks. Some platform-specific features still require you to finish publishing from a phone notification, and advanced collaboration features require a paid plan.
What Buffer’s Free plan includes
Buffer’s current official pricing and features guide lists three channel connections, one user and 10 queued posts per channel on the Free plan. The plan also includes custom posting schedules, image and video uploads, drafts, a calendar, basic analytics, an AI assistant and channel groups.
A “channel” means one individual profile, Page or account—not an entire social network. An Instagram account and a Facebook Page therefore use two of the three free connections, even if both belong to the same business.
Buffer supports publishing integrations for Facebook Pages, Instagram, X, LinkedIn, Pinterest, TikTok, Google Business Profile, Mastodon, YouTube Shorts, Threads and Bluesky. The exact publishing method depends on the account type and the network’s API rules.
Before connecting your social accounts
Decide which three channels matter most. Do not automatically connect every profile you own. A local business might choose Instagram, Facebook and Google Business Profile; a B2B consultant might get more value from LinkedIn, X and YouTube Shorts.
Then prepare the following:
- Admin or owner access to the Page or profile you want to connect.
- Two-factor authentication and recovery methods for each social account.
- The correct business or creator account type where automatic publishing requires it.
- Images and videos that meet each network’s size, duration and aspect-ratio rules.
- A clear timezone for your audience and posting calendar.
Connect accounts only through Buffer’s official site and the social network’s own authorization screen. Avoid extensions that promise to bypass publishing restrictions; review our guide on checking whether a browser extension is safe before adding anything that can access business accounts.
How to schedule social media posts for free with Buffer
1. Create a free Buffer account
Visit Buffer’s official website, create an account and choose the Free plan. A trial may temporarily expose paid features, so check the plan shown in your account before building a workflow that depends on approvals, advanced reports or other paid controls.
2. Connect up to three social channels
Open the Channels area, choose a network and complete its official sign-in and permission flow. Read each permission rather than accepting blindly. Buffer needs publishing access to schedule content, but you should confirm that the account, Page and permissions shown are the ones you intended.
Buffer’s supported-channels table notes some important restrictions. Facebook personal profiles cannot be connected, while Facebook Pages are supported. Instagram professional accounts can use more publishing features than personal accounts. Unsupported account types may require a different workflow or may not connect at all.
3. Set a posting schedule and timezone
For each connected channel, open its posting schedule and choose the days and times when content should go out. Check the timezone carefully. A 9:00 AM queue built in the wrong timezone can publish while your audience is asleep.
A simple starting schedule is three posts per week, spaced across different days. After several weeks, compare performance rather than assuming a universal “best time.” Buffer can suggest posting slots based on engagement patterns for the connected channel, but your own audience data should guide the final decision.
4. Create a post and select its channels
Choose Create Post, select one or more channels and add your caption, link and media. Buffer can create a version for several channels at once, but selecting multiple accounts should be the start of the process—not the end.
Use Customize to adapt the post for each network:
- Shorten or reshape the opening line for platforms with compact previews.
- Use platform-specific @mentions because handles can differ between networks.
- Check image crops and video orientation separately.
- Remove instructions that make sense only on another platform, such as “link in bio.”
- Confirm that links, hashtags and calls to action match the destination audience.
This prevents the obvious “copied everywhere” look while preserving the time-saving benefit of one workspace.
5. Choose when the post should publish
Buffer’s official scheduling guide documents several options:
- Next Available: add the post behind the existing items in that channel’s queue.
- Set Date and Time: publish at a specific date and time.
- Now: publish immediately.
The paid plans also provide controls that may not be available on Free, so rely on the options displayed in your current account. After scheduling, open the calendar or All Channels view and verify the date, time, timezone and selected profiles.
How the 10-post Free limit works
The limit is a queue cap, not a lifetime allowance. You may have up to 10 future posts scheduled on each connected channel. Once a post publishes, the slot opens and you can schedule another.
With three free channels, you can therefore maintain as many as 30 queued channel-posts at one moment. A single message scheduled to Instagram, Facebook and LinkedIn occupies one queue slot on each of those channels.
To work comfortably inside the limit:
- Plan one or two weeks rather than an entire quarter.
- Refill the queue on a fixed day each week.
- Keep unfinished ideas as drafts instead of scheduling placeholders.
- Pause a queue when a crisis, holiday or breaking event makes planned posts inappropriate.
- Delete obsolete scheduled posts to release slots.
Automatic publishing vs. notification publishing
Not every scheduled item can publish completely in the background. Social networks decide what third-party tools may do through their APIs. When automatic publishing is unavailable, Buffer uses notification publishing: it alerts your phone at the scheduled time and guides you through the final steps in the native app.
Instagram is a common example. Buffer’s official Instagram guide says professional Business or Creator accounts can automatically publish supported posts, carousels, Reels and Stories. A personal Instagram account uses notification publishing. Features such as trending music, stickers, polls, product tags and collaboration posts may also require manual completion in Instagram.
Install the official Buffer mobile app and enable its notifications if any queued post uses this method. A notification-based post is not successfully published merely because it appears on the calendar.
How to avoid failed scheduled posts
Keep channel connections current
Social authorization tokens can expire or be revoked after a password change, security event or permission update. If Buffer flags a disconnected channel, reconnect it from the dashboard before the next scheduled time. If you suspect unauthorized Facebook access, follow our guide to logging out of Facebook on all devices and securing the account.
Wait for media uploads to finish
If the Schedule button stays unavailable, confirm that every image or video has fully uploaded. Large files and unstable connections can leave a post in an incomplete state. Do not close the composer until the media preview is ready.
Respect each platform’s media rules
A file accepted by one network may fail on another because of its aspect ratio, format, size or duration. Customize the media when necessary and preview every channel version. For video posts, use music you have permission to publish; a scheduler does not prevent Content ID claims or copyright enforcement. Our guide to removing copyrighted music from a YouTube video explains why rights checks still matter after publishing.
Check platform-specific features
Mentions, locations, first comments, link previews, stickers and collaborator tags do not work identically across networks. If a feature is essential, confirm it in Buffer’s current help documentation or choose notification publishing so you can add it in the native app.
A practical weekly Buffer workflow
A lightweight routine keeps the free queue useful without turning scheduling into another full-time task:
- Collect ideas: save questions, announcements, tips and customer stories as drafts.
- Choose the week’s posts: select three to five ideas that serve different purposes rather than repeating the same promotion.
- Create the master version: prepare the main message and approved media.
- Customize each channel: adjust the hook, length, mentions, link and crop.
- Schedule and review: inspect the calendar for gaps, clashes and incorrect timezones.
- Check notification posts: mark which items need a phone at publishing time.
- Review results: use the Sent and Insights views to identify formats worth repeating.
Do not fill the calendar merely to appear active. A manageable schedule with useful posts is better than a crowded queue of near-duplicates.
When the Free plan is enough—and when it is not
Buffer Free is sufficient when one person manages no more than three key channels and can work within 10 queued posts per channel. It is especially useful for testing a consistent scheduling habit before paying for a larger system.
Consider a paid plan when you need more than three channels, a long queue, advanced reporting, campaign tags, custom UTM parameters, approval workflows, additional users or features that the pricing table marks as paid. Calculate the price based on the actual number of connected channels, because Buffer charges paid plans by channel.
Before upgrading, remove inactive accounts and decide whether every profile genuinely needs central scheduling. Paying for fewer, strategically important channels can be more useful than connecting every network your brand has ever created.
Frequently asked questions
Is Buffer really free?
Yes. Buffer currently offers a Free plan with three channel connections and 10 scheduled posts per channel at a time. Paid features and plan limits can change, so verify the official pricing page before committing a business process to a specific limit.
Can Buffer post to Instagram automatically?
It can automatically publish supported content to Instagram Business and Creator accounts. Personal accounts and posts using features the API does not support may require notification publishing and manual completion in Instagram.
Can I schedule the same post to multiple platforms?
Yes. Select multiple channels in the composer, then customize each version. Mentions, media shapes, caption styles and platform features differ, so avoid sending one unchanged version everywhere.
What happens after I reach 10 scheduled posts?
You cannot add another queued post to that channel until a scheduled item publishes or you remove one. Published posts release their queue slots.
Can Buffer edit or delete a post after it is published?
No. Buffer’s scheduling documentation says published posts must be edited or deleted directly on the social network. The Sent tab provides a history, but it does not replace the network’s native editing controls.
Does scheduling hurt reach?
There is no reliable basis for assuming that using an authorized scheduling tool automatically reduces reach. Content relevance, retention, timing and audience response matter more. For posts that rely on native-only features—such as trending music or interactive stickers—notification publishing may be the better workflow because you finish the post inside the platform.